A weak or flickering flame on your gas stove isn’t just inconvenient—it can slow down cooking, waste fuel, and indicate grease or debris buildup in the stove’s nozzles or gas tubes. Fortunately, there’s a simple and cost-effective solution using items you likely already have at home. With careful cleaning, you can restore your stove’s flame and extend the life of your appliance.
What You’ll Need:
Aluminum-safe cleaner – Effective for dissolving grease and grime without damaging metal components.
Wooden stick or narrow tool – A chopstick, spoon handle, or slim rod works well to reach inside gas tubes safely.
Soft cloths or toilet paper – For wiping away loosened residue and drying parts.
(Optional) Small brush or pipe cleaner – Helps remove stubborn buildup.
Step 1: Prepare Safely
Turn off all burners and let them cool completely.
Disconnect the gas supply to prevent accidents.
Remove grates, burner covers, and nozzle caps to access the internal parts.
Place removable components in a sink or tray for cleaning.
Step 2: Apply Aluminum Cleaner
Pour a small amount of aluminum-safe cleaner onto the metal nozzles.
Let it sit for 5–10 minutes to dissolve hardened grease, carbon, and food particles.
Avoid bleach or corrosive chemicals—they can damage metal.
Tip: A paste of baking soda and vinegar works as a mild, natural alternative.
Step 3: Clear the Gas Tube
Gently insert your wooden stick or narrow tool into the gas openings where flames appear.
Move it back and forth carefully to loosen any blockages. Avoid forceful twisting or jabbing.
Use a pipe cleaner or small brush for tight spots.
You may see black soot, yellow grease, or dust clumps—these are common causes of weak flames.
Step 4: Wipe and Dry
Use a soft cloth or toilet paper to remove all cleaner and residue.
Rinse removable parts under warm water if needed and dry thoroughly.
Ensuring the nozzles are completely dry is crucial for proper ignition.
Step 5: Reassemble and Test
Reattach burner caps, grates, and other removed parts.
Reconnect the gas supply and ignite the stove.
A strong, steady blue flame indicates gas is flowing efficiently through clean channels.
Bonus Maintenance Tips
Clean your stove every 2–3 months, or more often if cooking with oil regularly.
Always use non-corrosive, aluminum-safe cleaning products.
After reassembly, perform a gas leak test: turn the gas on slightly and check for leaks with soapy water or by smelling for gas.
If the flame still burns yellow or emits an unusual odor, contact a professional technician for inspection.
Why This Matters
Regular cleaning ensures faster, more efficient cooking, better heat control, lower fuel usage, and a safer kitchen. Spending 15–20 minutes every few months maintaining your stove protects your appliance, your home, and improves your cooking experience.
Related Posts

The Deadly Ingredient Hiding in Your Kitchen: Why That Bitter Taste Could Be a Fatal Warning
You may think you’re serving a healthy, home-cooked meal, but an unusually bitter taste could signal something more serious than bad seasoning. Food safety experts warn that…

Viewers Spot a Subtle Detail in Coca-Cola’s Iconic Logo
Some people have noticed that the second “C” in the Coca-Cola logo looks like a smile—and once you see it, it’s hard to ignore. The familiar red-and-white…

A Viral ICU Rescue Clip Wasn’t What It Seemed
A tense hospital video recently spread across social media, showing what appeared to be a nurse rushing to save an unconscious patient in an intensive care setting….

‘Most beautiful girl in the world’ Thylane Blondeau marries French DJ in fairytale Paris wedding
Thylane Blondeau was six when the world decided how she should look. Now 25, she has stepped into a new chapter—one defined on her own terms. Once…

I found this tiny white stick in my son’s room and was too embarrassed to ask him does anyone know what it is?
What I thought was a mysterious gadget turned out to be something surprisingly ordinary. After searching online and comparing photos, I discovered it wasn’t a vape, hidden…
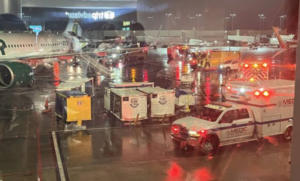
Charlotte Airport Faces Flight Delays Followin
Operations at Charlotte Douglas International Airport experienced temporary delays after a Frontier Airlines aircraft was involved in an unusual ground servicing incident before departure. Although the event…